
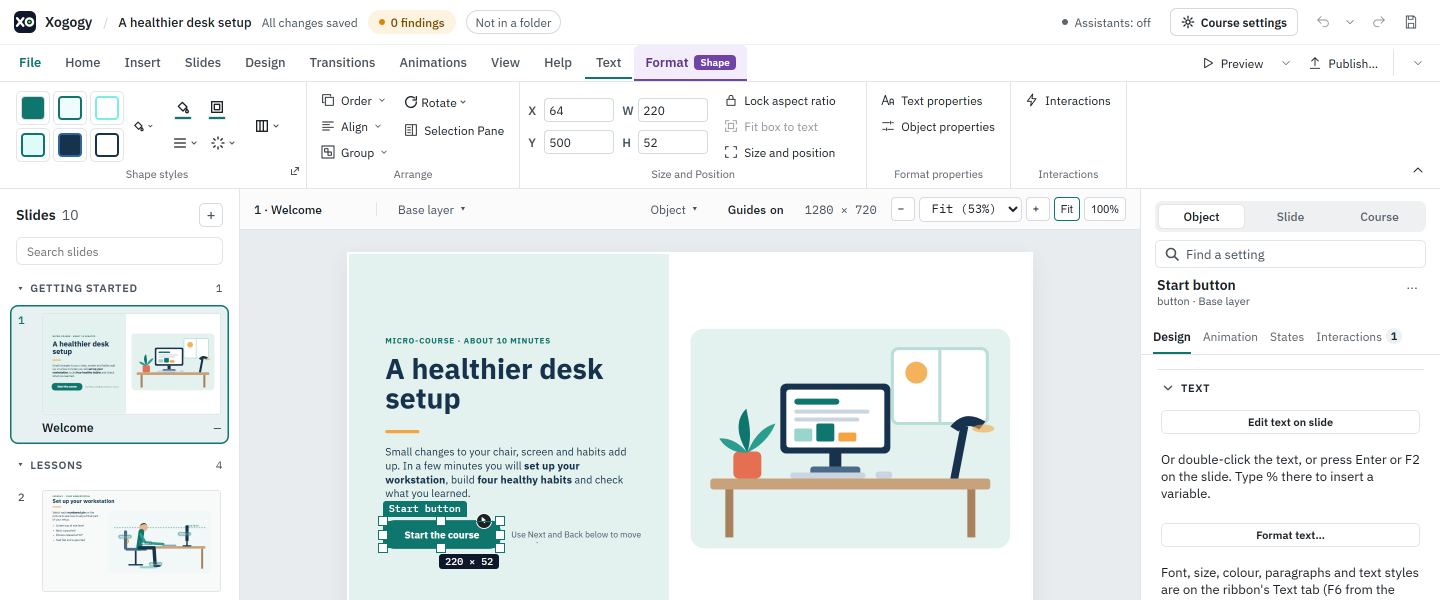
Formatting changes how an object looks: its fill, outline, shadow, glow, corners and transparency. All of it lives on the ribbon. When you select an object, a Format tab appears. Its badge names what you selected: Text, Shape, Picture, Video, Audio or Table.
Apply a shape style
- #
Select the shape, button or text box on the slide.
- #
On the Format tab, pick a style in the Shape styles gallery. Choose All shape styles to see the whole list, such as Solid Accent, Subtle Outline, Elevated Card, Glow Callout and Dark Banner, plus any styles saved in the course. The styles use your theme colours, so they match the rest of the course.
Set the fill, outline and effects yourself
- #
Select the object and open the Format tab.
- #
Next to the gallery, open Shape fill or Shape outline and pick a colour. Colour pickers offer your theme colours, recent colours and a custom value. No fill and No outline clear them. Home › Drawing has the same Shape fill and Shape outline drop-downs.
- #
Use Outline weight and dashes for the line's thickness and pattern, and Shape effects for Shadow and Glow.
- #
For gradients, picture fills, line style and shadow details, choose the small arrow at the corner of Shape styles, or Line options… and Shadow and glow options… at the bottom of those drop-downs. Format details opens beside the slide.
Set transparency and corners
- #
Select the object and open the Format tab.
- #
Open Transparency in Shape styles (Picture styles for a picture; video, audio and tables have their own Transparency group). Type a Transparency (%) from 0 to 100, or pick 0, 25, 50 or 75 %. 0 is solid; higher values let the slide show through. Clear transparency removes it.
- #
For a rounded rectangle, open Shape effects and type a Corner radius (px). An empty box shows the radius the shape uses, such as 8 (default). Other shapes have no corner radius, and the box says so.
Format a picture
- #
Select the picture. The Format tab shows Picture on its badge.
- #
Use Replace image… (Adjust), Crop and Fit (Crop) and Alt text (Accessibility). Replace image… opens the file picker at once. See How do I crop, fit or replace a picture?.
- #
Pick a look in Picture styles. Its corner arrow opens Format details for the picture's border, shadow and glow.
Copy formatting from one object to another
- #
Select the object whose look you want to copy.
- #
Choose Format painter in the Clipboard group of the Home tab. It is also in the right-click menu.
- #
Click the object you want to change. From the keyboard, press Enter or Space on that object's row in the Timeline, or with that object focused on the slide. Press Escape to cancel instead.
To paint several objects at once, select them all, selecting the one whose look you want last, then choose Format painter. Its format goes onto all the others in one step. The editor says what was painted, or why nothing changed.
Format painter copies the fill, line, corner radius, shadow, glow, opacity, the text box settings (margins, vertical alignment, autofit and wrap) and the text formatting. The words, links, position, size, rotation, shape, name, interactions and animations stay as they were. Inside a group, click the object itself, such as one card, rather than the group. Only the target's normal look changes; its Hover, Selected and other states keep their own formatting. If the target already matches, the slide says there was nothing to paint.
Format several objects at once
- #
Hold Ctrl and click each object, or press Ctrl+A to select every object on the slide.
- #
Apply a shape style, fill or outline. Every selected object that supports it changes.
What an empty box means
A box the course leaves empty shows the value the object actually uses, marked (default), such as 10 (default) for a text box margin. Type or choose a value to override it. In a course made in Xogogy, text boxes, shapes and buttons start with a small inner margin (10 px left and right, 5 px top and bottom), shape and button text sits in the middle, and a rounded rectangle has 8 px corners. Imported courses keep the look they came with.
Save a look as a style or a default
At the foot of the All shape styles list in Shape styles, and on the right-click menu:
- Save selection as new style… adds this object's look to the gallery under a name you type.
- Set as default shape (Set as default text box for a text box) makes new objects of that kind start with this look.
While you edit an object state, both are off, because every state shares them.
Tip: Want every new shape to look like this one? Use Set as default shape. See How do I set the look of new shapes, buttons and text boxes?. Can't find a control? Use Find a setting.
Each formatting change is one step you can undo with Ctrl+Z.
Still stuck?
Write to support@xogogy.com. A person at GForce Learning reads every message. Include the app version from Help › About Xogogy.